Push RDP files to clients using Intune and PowerShell
Some companies want to make RDP connections very easily accessible for their users, by adding a shortcut to the users’ desktop. This provides more convenience for users that have to access remote machines often. In this post I will show you step-by-step how to push RDP shortcuts to clients using Intune and PowerShell.
Create an RDP file on your client
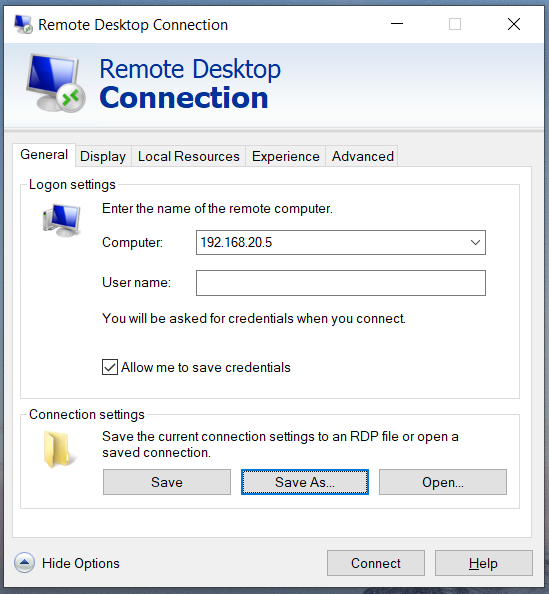
First of all, you will want to create a basic RDP file on your computer to use as an example. This can either be your own computer or a (virtual) machine in the target environment. Open mstsc.exe on the computer and enter the target RDP address. Don’t forget to check the “Allow me to save credentials” box and click Save As. Choose a location you can find and save the RDP file.
Open the RDP file in your code editor
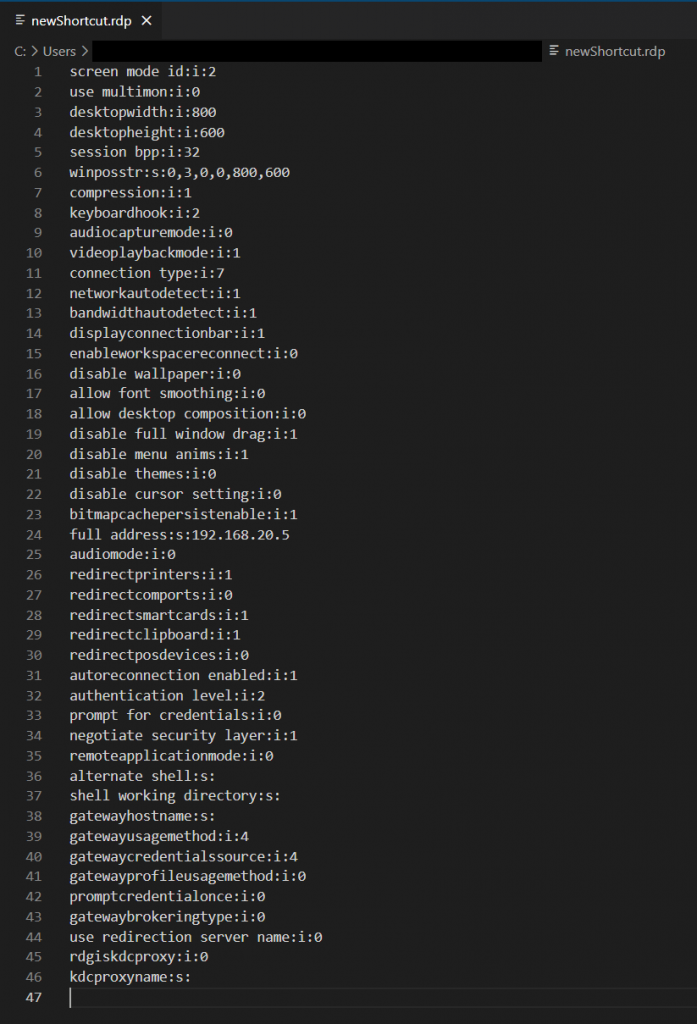
Once you have saved this .rdp file, you can open it with your favorite code editor. I use Visual Studio Code, but you can use any editor. The opened file is a block of text on multiple lines and will look similar to this this:
Here-string in PowerShell
The next step is to wrap this information in a neat PowerShell script. This is not a complicated or long script, so anyone with basic PowerShell knowledge can do this.
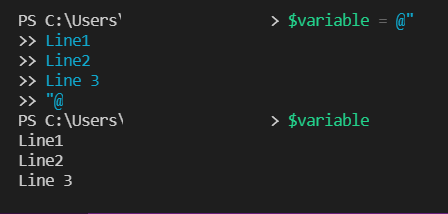
You will first declare the variable named $rdpFile and save a so-called here-string to this variable. Here-strings are blocks of tekst. Where regular strings can only contain one line, here-strings can contain multiple lines. The here-string is used to put the block of text containing the RDP file into a single variable. This is an example on how to create a here-string:
$variable = @"
	Line1
	Line2
	Line 3
"@
In the following picture, you can see that the text that was added to the variable is formatted the same when you output the variable:
This here-string can also be used to create a neat RDP file and add it to a variable. When using my example RDP file, the code will look like this:
$rdpFile = @"
screen mode id:i:2
use multimon:i:0
desktopwidth:i:800
desktopheight:i:600
session bpp:i:32
winposstr:s:0,3,0,0,800,600
compression:i:1
keyboardhook:i:2
audiocapturemode:i:0
videoplaybackmode:i:1
connection type:i:7
networkautodetect:i:1
bandwidthautodetect:i:1
displayconnectionbar:i:1
enableworkspacereconnect:i:0
disable wallpaper:i:0
allow font smoothing:i:0
allow desktop composition:i:0
disable full window drag:i:1
disable menu anims:i:1
disable themes:i:0
disable cursor setting:i:0
bitmapcachepersistenable:i:1
full address:s:192.168.20.5
audiomode:i:0
redirectprinters:i:1
redirectcomports:i:0
redirectsmartcards:i:1
redirectclipboard:i:1
redirectposdevices:i:0
autoreconnection enabled:i:1
authentication level:i:2
prompt for credentials:i:0
negotiate security layer:i:1
remoteapplicationmode:i:0
alternate shell:s:
shell working directory:s:
gatewayhostname:s:
gatewayusagemethod:i:4
gatewaycredentialssource:i:4
gatewayprofileusagemethod:i:0
promptcredentialonce:i:0
gatewaybrokeringtype:i:0
use redirection server name:i:0
rdgiskdcproxy:i:0
kdcproxyname:s:
"@
Create your script
From here, you will need to make sure the variable will be executed on the users desktops. In order to do that, the easiest solution is to use the public desktop. This will make sure the variable, or RDP file, which is how it will end up, is added to each users desktop. Doing this requires a simple one-liner, which uses the previously created $rdpFile and a name for the new shortcut:
$rdpFile | Out-File "$env:public\Desktop\newRDPFile.rdp" -Force
Now add this oneliner at the bottom of your script containing the here-string. You can add as many shortcuts as you want. Just repeat the process, make sure to declare a new variable using the here-string and add the oneliner at the bottom, using a unique name for your RDP file. By adding more RDP files to your script and using the Out-File cmdlet after each declaration, you can bulk push RDP files for your users.
This is all you need to add one or more RDP files to the users’ desktop. Save your entire script in an accessible location.
Using Intune for scripts
In Intune, you can add custom scripts to your devices. These scripts run once only, unless changes are made. More background information on how to use scripts in Intune and how they work, as well as the prerequisites to use scripts, can be found in the Microsoft documentation.
Navigate to the Microsoft Endpoint Manager portal and find the the Scripts blade, under Devices, as shown here.
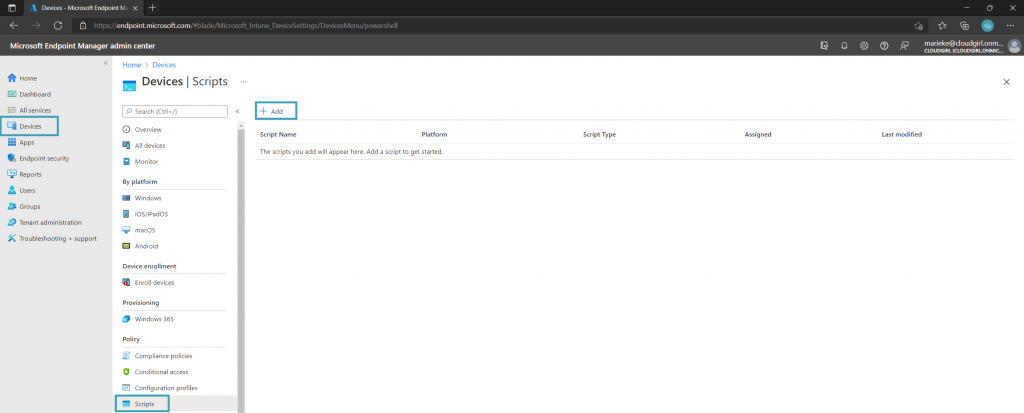
When adding a script, you can choose for either MacOS or Windows 10 or later. In this tutorial we will focus on Windows 10 and later.
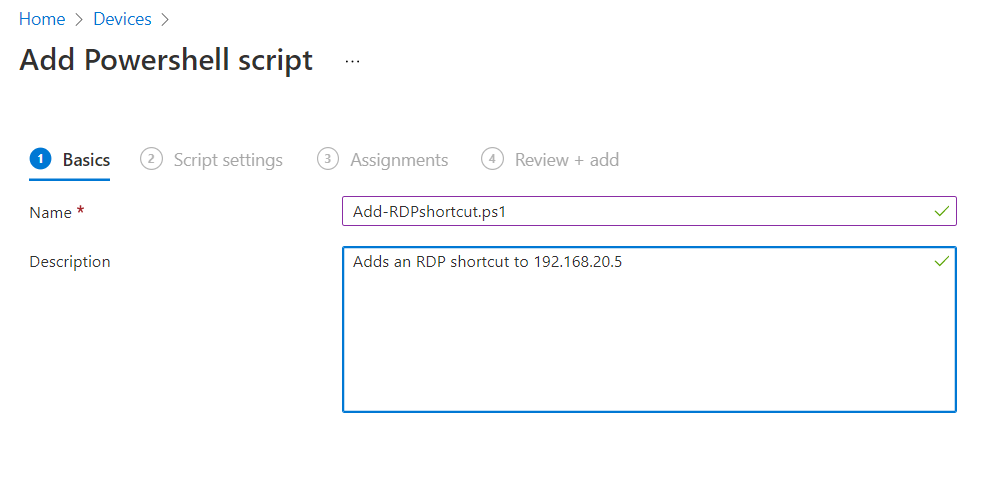
Choose to add a script for Windows 10 and later and give the script a functional title. You can also add a description, which is always useful for manageability, but this is optional. In the next step, you upload your script.
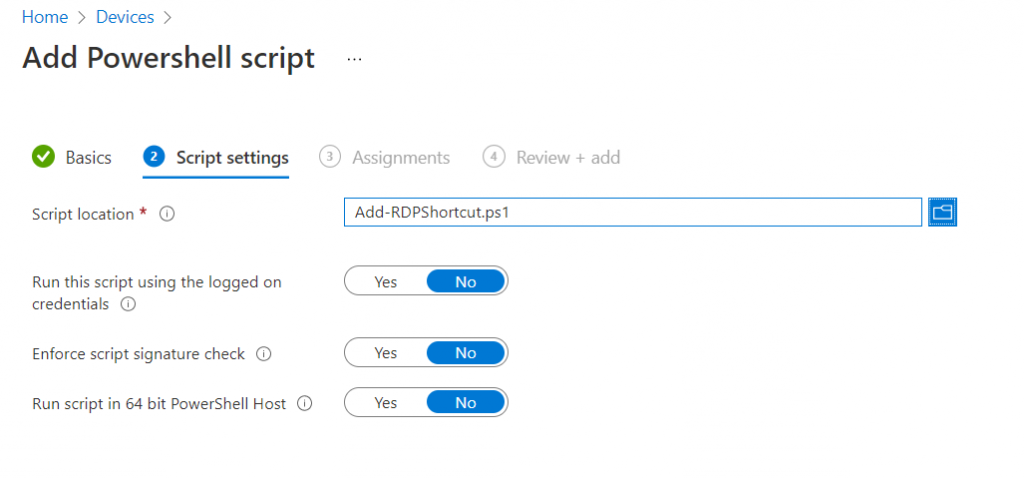
You can leave all the default settings, which means everything is set to no, in this scenario. If you want to know more about what each of these settings do, I’d recommend reading the Microsoft documentation about these scripts.
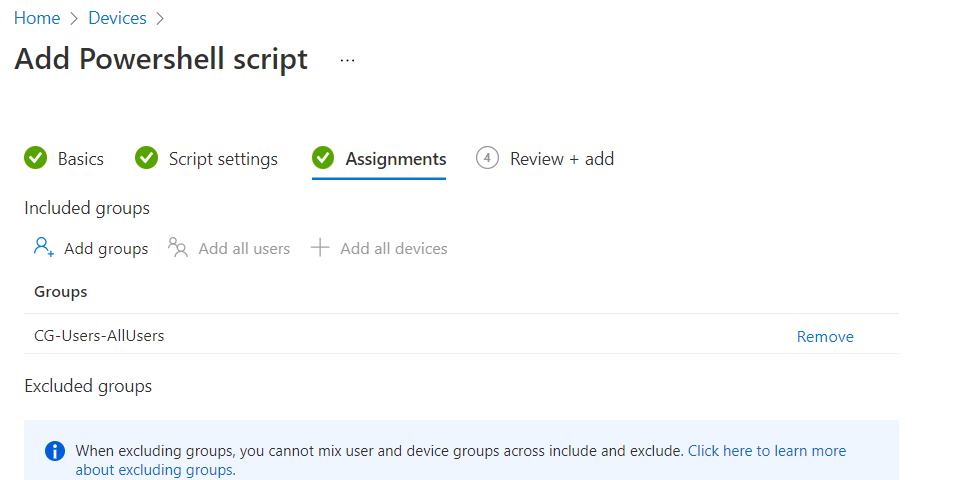
In the third step, don’t forget to assign your script to the desired user group. This will make sure the scripts are being pushed to the users’ desktops.
Below, you can see what this should look like in Intune.
Your script will now run once a user starts their computer and this is how you push RDP shortcuts to clients using Intune and PowerShell.

